Melt-In-your-mouth pumpkin cookies

To me, fall means football, raking leaves, picking apples, the occasional PSL (don't judge), and these cookies.  These are by far THE BEST pumpkin cookies.  I can't take credit for this recipe.  I discovered it a few years back in an issue of Better Homes and Gardens magazine.  I have made them every fall since then.  They literally melt in your mouth (maybe because there is a pound of butter in the recipe?)  This recipe is also great to make for a party or tailgate because it makes a ton - about 60 cookies!

FullSizeRender.jpg

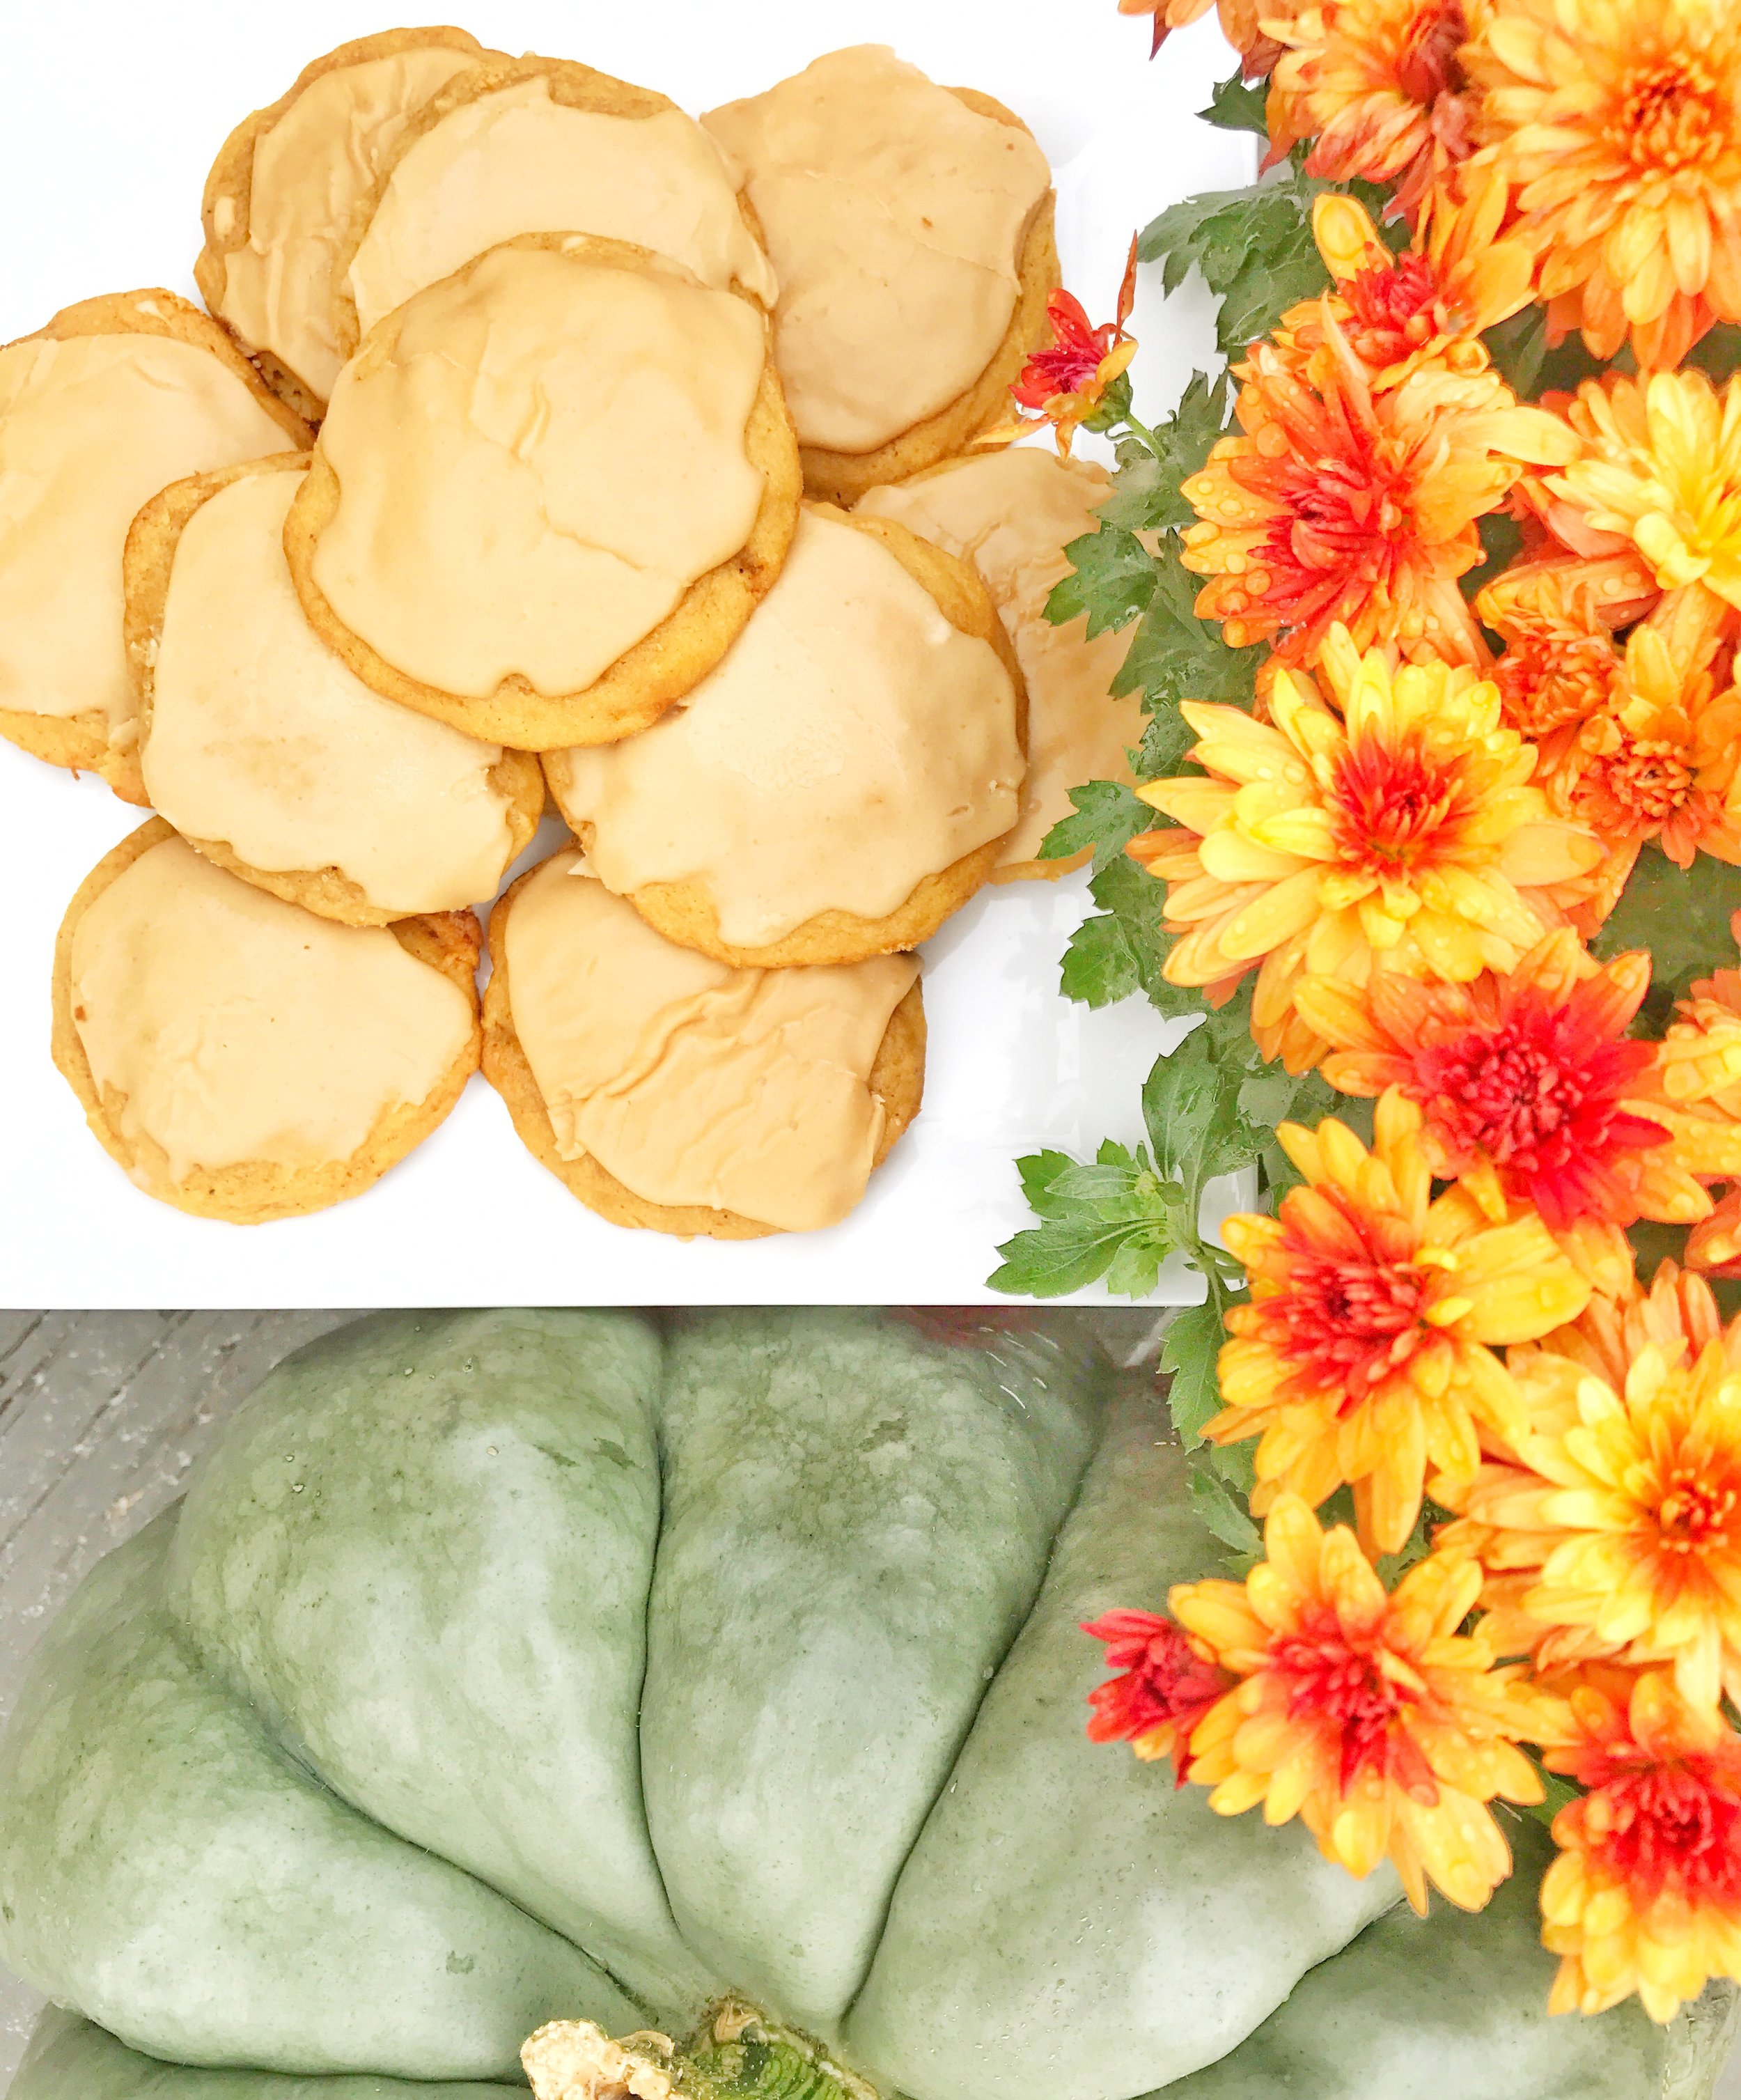
Melt-In-Your-Mouth Pumpkin Cookies

Ingredients

  • 2 cups butter, softened
  • 2 cups granulated sugar
  • 2 teaspoons baking powder
  • 2 teaspoons baking soda
  • 1 teaspoon salt
  • 1 teaspoon ground cinnamon
  • 1 teaspoon ground nutmeg
  • 2 eggs
  • 2 teaspoons vanilla
  • 1 15 ounce can pumpkin
  • 4 cups all-purpose flour
  • 1/2 cup butter
  • 1/2 cup packed brown sugar
  • 1/4 cup milk
  • 1 teaspoon vanilla
  • 2 3/4 cups powdered sugar
  • Ground cinnamon (optional)

Directions

Preheat oven to 350 degrees F. In a large bowl, beat 2 cups butter with an electric mixer on medium to high speed for 30 seconds. Add granulated sugar, baking powder, baking soda, salt, cinnamon, and nutmeg. Beat until combined, scraping bowl occasionally. Add eggs and 2 teaspoons vanilla; beat until combined. Beat in pumpkin. Beat in as much of the flour as you can with the mixer. Using a wooden spoon, stir in any remaining flour.

Drop dough by heaping teaspoons 2 inches apart on an ungreased cookie sheet. Bake in the preheated oven for 10 to 12 minutes or until tops are set. Transfer cookies to a wire rack; let cool.

In a small saucepan, heat 1/2 cup butter and brown sugar until melted and smooth. Transfer to a medium bowl. Stir in milk and 1 teaspoon vanilla. Beat in powdered sugar until smooth. Spread frosting on cookies. If desired, sprinkle with additional cinnamon. Makes about 60 cookies.


Hot Sausage and Pepper Sandwiches

These hoagies have been a grilling staple at our home this summer.  I have never been that crazy about a plain old hot sausage sandwich, but this recipe takes them to the next level!  The tang from the pickled peppers and vinegar cuts through the richness of the sausage and the fresh herbs really brighten it up.  This would be the perfect tailgate hoagie too!

FullSizeRender-6.jpg


Ingredients

  • 1 lb. spicy Italian sausage 
  • 1 green bell pepper, halved and cored 
  • 1 red bell pepper, halved and cored  
  • 1 large onion, sliced into rings 
  • 1 cup pizza sauce 
  • 4 fresh Italian hoagie rolls 
  • 1/4 cup sliced pickled cherry peppers
  • 1/2 cup fresh basil, minced 
  • 1/4 cup fresh parsley, minced 
  • 2 tablespoons red wine vinegar 
  • 8 slices provolone cheese 

Directions

Preheat a grill to medium high heat.  Grill the sausage, peppers and onions until the sausage is cooked through and the vegetables are slightly tender and a little charred, 10 to 15 minutes. Slice the sausage, peppers and onions.

In a small pot, heat the pizza sauce until warm.

Remove some of the bread from the inside of each grinder roll. Dress the grinder rolls with about 2 tablespoons olive oil and some salt and pepper. Grill until toasted, 1 to 2 minutes, then rub with a clove of garlic.

In a large bowl, combine the sausage, peppers, onion, tomato sauce. Toss until coated.

In a separate bowl, combine the cherry peppers, basil, parsley and red wine vinegar and season with salt and pepper. Add about 2 tablespoons olive oil to bind it all. Mix until well combined.

Place enough of the sausage mixture into each bun to fill. Cover with 2 slices of provolone cheese in each grinder. Place back on the grill on the top rack with the cover down. Cook until the cheese is melted, about 5 minutes. Top with the cherry pepper mixture.

Served with a grilled Caesar salad

Served with a grilled Caesar salad

What to do with all that zucchini

We do it every year.  Every year we plant too many zucchini plants in our garden.  I don't know why.  Maybe I fear that we will run out?  Even though one plant produces nearly a hundred zucchini a day.  You literally can't give them away (we have tried), you can only make people eat so much zucchini bread, and you certainly can't throw them away.  That is sacrilegious in the gardening world.  So I have been searching for more ideas.  I found a few favorites that I will share in the next few posts.  Here is the first one that I am serving tonight with my Thai Chicken Lettuce Cups.

Asian Zoodle Salad

I still haven't decided if I'm on the zoodle band wagon, but I have to say this one was delish!  It's a quick, heathly salad as a side or you could add some chicken, shimp, or steak for a main dish.  The colors of this salad are so beautiful too!

Ingredients

For the Dressing

  • 1/4 cup olive oil
  • 1/4 cup low-sodium soy sauce 
  • 2 tablespoons grated fresh ginger (from about a 2-inch piece) 
  • 2 tablespoons honey 
  • 1 tablespoon sesame oil 
  • 2 cloves garlic, grated 
  • Zest and juice of 1 lime 

For the Salad

  • 2 zucchini, spiraled
  • 2 cups matchstick carrots 
  • 2 Persian cucumbers, halved and thinly sliced 
  • 2 red bell peppers, thinly sliced 
  • 1/2 small red cabbage, thinly sliced
  • 1 cup cashews, halved or chopped
  • 1/2 cup coarsely chopped fresh basil, plus whole leaves, for garnish 

Directions

To make the dressing, whisk together the olive oil, soy sauce, ginger, honey, sesame oil, garlic, lime juice, and zest in a bowl. Set aside.

In a large bowl, combine the zucchini noodles, carrots, cucumbers, bell peppers, and cabbage. Add the dressing to the bowl and toss together gently (zucchini noodles are fragile). Garnish with the cashews and basil leaves and serve.  The salad can be prepped ahead of time, but do not add the dressing until right before serving.

Strawberry picking and Strawberry Lemonade Bars

The weather here in Pittsburgh has been absolutely perfect and last week I took my daughter strawberry picking at Simmons Farm.  

We had a great time, although I think my helper ate more berries than she picked!

We had such a fun time and got lots of berries!

We've been snacking on them all week long but I still had lots left over so I wanted to make a sweet treat with the remainders - Strawberry Lemonade Bars!

The recipe calls for 12 ounces of strawberry preserves.  You can certainly buy a jar of preserves and use that, but since I had so many berries, I made this quick and super simple homemade jam. The recipe makes a little more than what you need to make the bars, but thats not a bad thing!  You can keep it in the refrigerator for toast the next morning.

This recipe is a great base for any kind of fruit bar.  You could substitute blueberries, apples, lemon, raspberries, blackberries....just about any kind of fruit jam!

Strawberry Lemonade Bars

Indredients

For the Fresh Strawberry Jam (can be made ahead of time)

  • 2 cups of sugar
  • 1 lemon, zested and juiced
  • 3 cups of fresh strawberries, hulled and quartered

For the Bars

  • 2 cups old fashioned rolled oats (divided)
  • 1 1/2 cup all-purpose flour
  • 2/3 cup light brown sugar
  • 2/3 granulated sugar
  • 2 teaspoons salt
  • 3 sticks unsalted butter (cut into cubes)
  • 2 teaspoon vanilla
  • 4-6 tablespoons cold water
  • 12 ounces strawberry preserves
  • 1 lemon, zested and juiced
  • 1 cup fresh strawberries,hulled and coarsely chopped

Directions

For the Jam

Combine the sugar, lemon zest, and lemon juice in a small saucepan and cook over low heat for 10 minutes, stirring occasionally, until the sugar is dissolved.  Add the strawberries and continue to cook over low heat for 20-25 minutes, until the strawberries release some of their juices and the mixture boils slowly. Cook until a small amount of the juice gels on a very cold plate. (I keep one in the freezer.) Pour carefully into 2 pint canning jars, seal, and keep refrigerated.

For the Bars

Preheat oven to 375°F.  Butter a 9 x 13 inch non-stick cake pan  or spray with cooking spray.  Place a piece of parchment paper inside the cake pan so that some paper hangs over the edges.

In the base of a food processor, combine 3/4 cup of oats, flour, sugars, and salt until coarsely ground.  Add the butter and vanilla and pulse to create a crumb.  Gradually add in water and pulse until a dough forms.

Dump the dough into a large bowl. Divide the dough in half.  Press half of the dough into the prepared pan. Place in the oven and bake until the edges are golden brown, about 18-20 minutes.  Remove from oven and let cool slightly.  Crumble the rest of the oatmeal-shortbread dough into a mixing bowl and fold in remaining 1/4 cup of whole oats. Set aside.

Meanwhile, make the strawberry-lemonade filling.  In a medium bowl, mix to combine the strawberry preserves, lemon zest, and lemon juice. Add the strawberries and stir to combine. Set aside. 

Spread the strawberry-lemonade filling onto the baked crust.  Sprinkle remaining dough-oat mixture on top of the filling.  Place in the oven to bake until golden brown on top, about 25-30 minutes. 

Remove and let cool completely.  The bars will set up as they cool.   Use the parchment paper to help lift the bars out of the baking pan.  Cut into squares and serve.  Makes 12 squares.


Pineapple Party

Lately I have been obsessed with everything pineapple - especially in home decor.  Not only do these pretty pieces of fruit add a touch of the tropics, they also have symbolic meaning that is just as beautiful.  The pineapple is recognized as a traditional expression of “welcome".  The fruit symbolizes those intangible assets we appreciate in a home - warmth, welcome, friendship and hospitality.  I think they add a whole lot of fun too!

Here is a round-up of some of my favorite pineapple home decor items.  Links for everything listed below.

signature.PNG

My Beginner's Guide to Starting Your Own Vegetable Garden

I am so excited to get my veggie plants in the ground!  Gardening is something I have grown to love throughout the years.  My parents always had a garden and my grandmother, who grew up on a farm, was an avid gardener as well.  She lived right down the street from us and when I was little, and my summers were spent in her yard picking black berries, snapping the ends of green beans, and canning tomatoes.

Now Mr. Wright and I have started our own gardening traditions.  We make salsa out of our tomatoes, onions, jalapeños, and herbs.  Our family and friends are always asking for our famous Wrighty's "What the Dillio" dill pickles too!

Last summer's "Dillios" being canned

Last summer's "Dillios" being canned


If you have been wanting to reap the benefits of having your own garden but don't know how to start, I have put together a simple step by step guide of the basics:  

1. Find a location

Before deciding what you want to grow, map out a space and consider how much time and effort you can put into your garden.  Turning a large plot of your backyard into your own farmer's market requires quite a bit of time to maintain.  If you are short on time and don't have much of a green thumb, a container garden on your porch or patio might be the best bet for you.

Not my garden, but one of my dream gardens - the garden of Chef Marcela Valladolid in Chula Vista, CA

Not my garden, but one of my dream gardens - the garden of Chef Marcela Valladolid in Chula Vista, CA

Whether its a plot of land or a pot, make sure it is in a spot that gets at least 6-8 hours of sunlight a day.  If planting in the ground, choose a well drained area.  Prior to planting, enrich your plot with an inch layer of compost (we use mushroom manure) and apply an organic fertilizer.  If you'd like, you can also purchase a soil test kit to see exactly what nutrients are in your soil.  

If you are using containers, get some organic potting soil.  We have a large garden in our back yard but I also use containers on our deck for herbs.  It allows for easy access from the kitchen when I am cooking and need a few leaves of something.  I love these City Pickers

2. Pick What and When to Plant

Talk to other gardeners in your area or visit a local nursery to see what grows well in your particular area.  Choose vegetables that you love to eat.  It may sound sound like a no-brainer, but don't plant a bunch of tomatoes if you aren't going to eat them!  Plant what you like and will use often.  Then maybe throw in a few different plants that you would like to branch out and try.  Plant veggies that require similar amounts of water and sunlight in the same bed or container.   

DO NOT plant until after the last frost of the season.  It is so tempting to get started right away on that first sunny, warm day of spring.  However there is a good chance there may still be a frosty night and all of your hard work is ruined.  Our rule of thumb here in Pennsylvania is that you should wait until after Mother's Day to plant or you can check the HERE for you area's last frost date.


3.  Seeds vs Seedlings

Seeds are inexpensive and offer a wider selection of unusual varieties, but if you are just starting out, I suggest going with seedlings.  They give you a head start and you bypass some of the tricky, delicate care that seeds require.

4.  Care and Harvest

Now that you have prepped and planted your garden, all you have to do is keep up with routine tasks.  These include:

  • Watering - the amount of watering needs depends on your location.  Ask your local nursery for suggestions.  Here in PA we water just about every day unless there is steady rain in the forecast.  When temps get really high, we may water more often.  It is best to water in the morning or evening when the sun isn't at it's strongest.
  • Weeding - do this as often as you can to prevent weeds from overtaking your garden.  You can also add some of your grass clippings around the plants to prevent weed growth.  Just make sure your lawn wasn't treated with any chemicals because you don't want those chemicals near your food-growing plants!
  • Checking for signs of disease and pests

Now it's time to reap your rewards!  You will know when to pick by looking at the vegetables' size, shape, and color.  Every veggie is different so check the tag that the seedling came with.  You want to keep up with the harvesting to encourage new growth.  The more you pick, the more the plants produce!

Chef Marcela's harvest from her garden

Chef Marcela's harvest from her garden


Asian Salmon with Stir Fry Veggies and Jasmine Rice

This is a weeknight staple in our house.  It is fast, healthy, and so delicious!  I prep the veggies ahead of time and while the salmon is cooking, you can cook the rice and veggies.  It's an awesome meal that is ready in about 15 minutes!

Ingredients

For the Salmon

  • 2 cups of jasmine rice, cooked according to package instrucitons
  • 1 lb. of sockeye salmon, cut into 4 pieces
  • 2 Tablespoons Dijion mustard
  • 3 Tablespoons soy sauce
  • 6 Tablespoons olive oil
  • 1 clove of garlic, grated

For the Stir Fry Veggies

  • 3⁄4 cup chicken stock
  • 1 tablespoon cornstarch
  • 2 tablespoons soy sauce
  • 1 tablespoon brown sugar
  • freshly ground black pepper to taste
  • 2 tablespoons vegetable oil
  • 1 cup carrot, sliced diagonally
  • 1 cup celery, sliced diagonally
  • 1⁄2 cup onion, chopped
  • 8 oz. cremini mushrooms, sliced
  • 1 head of broccoli, cut into florets
  • 1 1⁄2 cups snow peas

Directions

Preheat over to 425 degrees.

Whisk together the mustard, soy sauce, olive oil, and garlic in a small bowl. Drizzle half of the marinade onto the salmon and allow it to sit for 10 minutes.

Cover a baking sheet with parchment paper and lay the salmon skin side down on the paper.  Bake for 10-12 minutes or until the salmon is cooked through.   **TIP: It's alway better to slightly undercook it.  The longer you cook it, the "fishier" it will taste!**

While the salmon is cooking, combine the chicken stock, corn starch, soy sauce, brown sugar, and pepper in a small bowl, whisk until well-blended and set aside.

Heat oil in a wok or large nonstick skillet over high heat.  Add carrot, celery, and onion; stir-fry 3-4 minutes until slightly tender.  Add mushrooms, broccoli, and snow peas and stir-fry for another 2-3 minutes. 

Add broth mixture; stir-fry 1 minute or until thick and bubbly.

Serve the veggies and salmon over the prepared rice.  Can be served with a drizzle of extra soy sauce or with additional reserved marinade.


Tropical Green Tea Smoothie

Our entire family is on a smoothie kick.  It started out as a tasty way to get our daughter to eat more fruits and veggies as she is becoming quite a picky eater.

But Mr. Wright and I have also joined the smoothie trend as a way to add more vitamins and nutrients into our diets.  You can shove so much good stuff into a blender and still have it come out tasting great! 

On Sundays I will whip up a big batch of them and pour individual servings into mason jars.  I throw them in the freezer and we can have them all week long without pulling out the blender everyday.  You just have to remember to take it out of the freezer a hour or two before you plan on drinking it.  Mr. Wright grabs one on his way to work and by mid-morning it is ready to sip,

This one is what I have been drinking all week and one of my favorites! It is very fruity, and has just a hint of spice from the turmeric 

Tropical Green Tea Smoothie (Makes about 3 servings)

Ingredients

  • 3 cups of a tropical blend of frozen fruit (mine was mangos, peaches, pineapple, bananas, and kiwi, but you can use any combo you prefer)
  • 2 cups of fresh spinach leaves
  • 1 Tablespoon ground chia seeds
  • 1 two-inch piece of fresh turmeric, peeled and chopped
  • 1 scoop of unflavored protein powder (optional)
  • juice of one lime
  • 1 1/2 cups unsweetened iced green tea

Directions

Add all ingredients into a high powered blender.  Pulse or blend until smooth.  Pour and serve immediately or pour into mason jars and freeze for later.

Jumping on the Kale Wagon for a Just Minute

Sometimes I think kale is way overrated.  However this salad has changed my mind...

Kale Salad with Ginger Honey Vinaigrette


SALAD:

  • 1 bunch Tuscan (lacinato) kale, washed, dried, ribs removed
  • 1 1/4 cups wild rice or long-grain brown rice, cooked
  • 1 apple, peeled, cored, finely diced
  • 1/4 cup pine nuts ,toasted
  • 1/2 cup pomegranate seeds

DRESSING:

  • 1 - inch piece fresh ginger, peeled
  • 1 clove garlic, peeled
  • 2 tablespoons white wine vinegar
  • 1 1/2 teaspoons honey
  • 1 teaspoon Kosher salt
  • freshly cracked black pepper, to taste
  • 1/4 cup extra-virgin olive oil 

For the Dressing: Peel the ginger and grate it on a microplane into a medium bowl.   Grate the garlic the same way into the bowl. Whisk in the vinegar, maple syrup, salt, and pepper to taste. Slowly whisk in the olive oil to emulsify. 

For the Salad: Stack a few kale leaves and roll them like a cigar, then thinly slice them crosswise into ribbons. Place in a large bowl.  Add the wild rice and apple and toss to combine.  Pour the dressing over the kale and toss to combine. . Let the salad sit for 10 minutes, then sprinkle with the nuts and pomegranate seeds and serve.

Tip: To toast the pine nuts, place them in a dry skillet over medium-low heat until golden brown, about 2-3 minutes. Remove and allow to cool.


New Project For A Very Important Client

I have been meaning to share this project for quite some time now, but my hands have been a little full.  One month ago Mr. Wright and I welcomed our beautiful baby girl, Cameron Marie, into the world.  She is absolutely perfect in every way. (including already sleeping through the night - we are so lucky!) We couldn't be more in love with her.

I had so much fun decorating her new room.  I wanted it to be girly, but I didn't want to overboard with pink.   I tried to create a calm and relaxing place for her to sleep, play, and grow.  

RESOURCES:

What's For Dinner - Cinco de Mayo

This is a great side for any Mexican dish or Cinco De Mayo celebration.  It can be served as a dip with tortilla chips or just by itself as a salad.  It pairs perfectly with my  Grilled Skirt Steak Tacos.

Corn, Black Bean and Tomato Salad


Salad:

  • 3 tablespoons olive oil
  • 1 onion, diced
  • 1 tablespoon kosher salt
  • 2 1/2 teaspoons smoked paprika
  • 1/2 teaspoon cayenne pepper, optional
  • 4 ears corn, kernels removed or 2 cups frozen and thawed corn kernels
  • 1 dried bay leaf
  • 3/4 cup chicken broth
  • 2 (15-ounce) cans black beans, rinsed and drained
  • 2 medium tomatoes, chopped
  • 1/4 cup chopped fresh cilantro leaves

Dressing:

  • 2 tablespoons lemon juice
  • 2 tablespoons lime juice
  • 3 tablespoons agave nectar or honey
  • 2 tablespoons lemon zest
  • 2 tablespoons lime zest
  • 1/4 cup extra-virgin olive oil
  • Kosher salt and freshly ground black pepper

Directions

For the salad: In a large skillet, heat the oil over medium-high heat. Add the onion, salt, smoked paprika, and cayenne pepper, if using. Cook for 6 to 8 minutes until soft. Add the corn kernels and bay leaf. Cook, stirring constantly, for 2 minutes. Add the broth and black beans. Bring the mixture to a boil, reduce the heat and simmer for 4 minutes. Add the tomatoes and stir until warmed through, about 1 minute. Remove the pan from the heat.

For the dressing: In a small bowl, combine the lemon juice, lime juice, agave nectar (or honey), lemon zest, and lime zest. Whisk in the olive oil until the mixture is smooth. Season with salt and pepper, to taste.

Remove the bay leaf and put the salad in a serving bowl. Pour the dressing over the salad and mix well. Season with salt and pepper, to taste. Garnish with chopped cilantro and serve warm or at room temperature.
 

Better Than Burnt Toast - Lemon Blueberry Bread

Mr. Wright is not much of a sweets eater.  Not good for me because when I bake, I end up eating the entire thing - whether it's an entire batch of cookies or a whole cake!

However this is one of his absolute favorites and I have to fight him for a slice!  I have had to make three of them this week - two for him for his breakfast and one for him to take to work.  If he loves it that much, you know it's a winner.

Lemon Blueberry Bread

Lemonblueberrybread

Ingredients

1 1/2 cups all-purpose flour

1 teaspoon baking powder

1/4 teaspoon salt

1 tablespoon grated lemon zest

1 cup fresh blueberries

1/2 cup butter, room temperature

3/4 cup granulated white sugar

2 large eggs

teaspoon pure vanilla extract

1/2 cup milk

Lemon Glaze:

2 tablespoons granulated white sugar

1 tablespoon fresh lemon juice


Directions

Preheat oven to 350 degrees F and place the oven rack in the center of the oven. Butter (or spray with a non stick vegetable spray) the bottom and sides of a 9 x 5 loaf pan.

In a separate bowl, whisk together the flour, baking powder, salt, and lemon zest. Remove 1 tablespoon of the flour mixture. Place the blueberries in a separate bowl and toss the berries with the 1 tablespoon flour (this will help prevent the blueberries from sinking to the bottom of the pan during baking.)

In the bowl of your electric mixer, or with a hand mixer, beat the butter until softened (about 1 minute). Add the sugar and continue to beat until light and fluffy (2-3 minutes). Add the eggs, one at a time, beating well after each addition. Scrape down the sides of the bowl as needed. Beat in the vanilla extract. With the mixer on low, add the flour mixture (in three additions) and milk (in two additions) alternately, starting and ending with the flour. Mix only until combined. Gently fold in the blueberries.

Scrape the batter into the prepared pan and bake for about 55 to 65 minutes, or until the bread is golden brown and a toothpick inserted in the center comes out clean.

Lemon Glaze: In a small microwaveable bowl, stir the sugar with the lemon juice. Place in the microwave for about 20 seconds or just until sugar has dissolved.

When the bread is done, remove from oven and place on a wire rack. Pierce the top of the hot loaf with a wooden skewer or toothpick and then brush with the hot lemon glaze. Cool the loaf in the pan for about 30 minutes then remove from pan and let cool completely on a wire rack. This bread is best served on the day it is made, but it can be stored several days or frozen.

Lemonblueberrybread


Now Trending - She Sheds

Forget about man caves, today it is all about the "she shed".   Now women have a place to retreat too!  She sheds can be a place to work, exercise, craft, or just get away to relax.  All I know is that I need one.  I'm thinking mine would have lots of windows so it would be filled with sunlight and views of the outdoors.  It would definitely include a comfy spot to lounge, much like the one in the first picture below.  I might also add a desk so I can say I am "working" when I head out to my she shed.  

What would you use your she shed for and how would you decorate it?

Better Homes and Gardens

Better Homes and Gardens

Better Homes and Gardens

Better Homes and Gardens

sheshed5
sheshed6
she-sheds-10.jpg
From Wooden House

From Wooden House

From Wooden House

From Wooden House

What's For Dinner - Asian Chicken Salad

You still have time to whip together this healthy dinner tonight.  It is perfect for a quick and easy weeknight dinner.  Make sure you make extra too for lunch tomorrow!

Asian Chicken Salad

asianchickensalad


Ingredients

Chicken

  • 1 pound of boneless, skinless chicken breasts

  • 1/4 cup low-sodium soy sauce

  • 1/4 olive or canola oil

  • 2 Tablespoons honey

  • 1 teaspoon fresh grated ginger

  • 1 garlic clove, grated

  • pinch of salt and pepper to taste

Dressing

  • 1/4 cup olive or canola oil
  • 2 Tablespoons low-sodium soy sauce
  • 2 tablespoons rice vinegar
  • 1/2 teaspoon granulated sugar
  • salt and pepper to taste

Salad

  • One head of shredded Napa cabbage

  • 2 cups shredded romaine lettuce

  • 1 red bell pepper thinly sliced

  • 1/2 cup baby carrots, thinly sliced

  • 1 stock of celery, thinly sliced

  • 1/2 cup of roasted peanuts (optional for garnish)

  • 1/2 cup crispy rice noodles or chow mien noodles (optional for garnish)

Directions

For the Chicken: Place the chicken breasts in a zip lock bag.  In a small bowl, combine soy sauce, oil, honey, ginger, garlic, salt, and pepper and mix well.  Pour the mixture into the bag with the chicken.  Seal and refrigerate for 30 minutes or up to 2 hours.

Preheat the oven to 400 degrees.  Transfer the chicken to a shallow baking dish, discarding the marinade.  Bake for 25-30 or until the chicken is cooked through.***Note: Grilling the chicken would be great too!***  Let the chicken rest for 5 minutes, then slice.

For the Dressing: In a small bowl, whisk together the oil, soy sauce, vinegar, and sugar until smooth. Season with salt and pepper, to taste, if using.

For the Salad: In a large salad bowl, add the cabbage, lettuce, peppers, carrots, celery, peanuts, and rice noodles.  Pour the dressing over the salad and toss to combine. 

Serve with the sliced chicken on top.


New Designs for Spring/Summer 2015

We have just launched a new collection of fabrics and wallpaper for spring and summer.  These fresh new designs offer a few new colors but also coordinate well with our original collection.  Some are brand new designs, like the Charleston damask print and the Watercolor Bouquet floral, but we have also added new colorways to some of our most popular designs including Blossom, Pineapple, Leo, and Ikat.

Check them out in the FABRIC SHOP and WALLPAPER SHOP


Wallpaper Is Not Just For Walls - 7 DIY Projects With Wallpaper

Wallpaper is not just for walls.  Customize many areas of your home with one roll of wallpaper or less!  Have you checked out my wallpaper collection in my shop?  It is sold in several different sized rolls as little as 1 foot long - perfect for those small DIY projects! You can purchase all my wallpaper designs here

1. Framing Paper

One of the simplest ways to add a pop of your favorite wallpaper design without the commitment of papering the entire wall is to frame it.  Just like any artwork, a framed piece of wallpaper provides an instant pop of color and pattern to a boring wall.

Framed wallpaper samples - Atlanta Homes and Lifestyles magazine designer Brian Patrick Flynn

Framed wallpaper samples - Atlanta Homes and Lifestyles magazine designer Brian Patrick Flynn

2. Dress Up Your Drawers

Swap patterned wallpaper for traditional drawer liners — it's a pretty little surprise every time you open the drawer.

HGTV.com

HGTV.com

.  To jazz up a boring bookcase, just paper the back wall of each shelf.  I LOVE these spot and the blue and gold combo done by Centsational Girl

4. Hanging Paper on the Ceiling

I love this idea and if you do it in a small room, such as a powder room, you really don't need a lot of wallpaper.  This is one of my favorites from Flavor Paper.  It's like you are looking up through the trees!

Canopy by Flavor Paper

Canopy by Flavor Paper

Kelly Deck Design

Kelly Deck Design

5. Step Up Stair Risers

6. Custom Shades on a Budget

You can find instructions on how to transform a basic vinyl shade into a custom window treatment here

HGTV.com

HGTV.com

7. Perk Up a Pendant

Find instructions here

HGTV.com

HGTV.com


Super Bowl Snacks - Pizza, Pizza, Pizza!

Fun fact: Super Bowl Sunday is the biggest day of the year for takeout pizza.  Lately, we have been making more of our own pizzas at home rather than takeout.  It's just as easy and everyone get to personalize their pie to exactly what they want.

My tips for making drool-worthy pizza at home?

  1. It all starts with the dough.  I have tried many recipes and even have a pretty good one that takes only 15 minutes (you can find that recipe here).  However, nothing beats the taste and convenience of buying the dough at your favorite local pizza shop.  It is something that is hard to replicate and it makes baking pizza at home a breeze.  I stop by my local shop and pick up a few pies for about $2 each.  
  2. You must use a pizza stone.  It is how you get that perfect crispy and chewy crust.  Also a pizza peel makes it much easier to place the pizza on the hot stone and take it out when it is done.

Here are two of our favorites pizza combos:

Mr Wright's Favorite: Spicy Sausage Pizza with Caramelized Onions

IMG_1464.JPG

Ingredients:

  • 1/3 lb. of ground hot Italian sausage
  • 1 tablespoon olive oil
  • 1 medium onion, thinly sliced
  • pinch of salt and pepper
  • pizza dough
  • 1/2 cup San Marzano tomato sauce
  • 2 cups of shredded mozzarella cheese

Directions

Place the pizza stone in the oven and preheat it to 450 degrees.

Cook the sausage in a sauté pan over med-high heat until brown.  Crumble into small pieces.  While the sausage in cooking, heat another pan over medium heat.  Add the olive oil and onions.  Cook until the onions are translucent.  Then lower the heat to low to med-low and cook the onions until they are caramelized and golden brown (about 20-30), stirring occasionally.  Add a pinch of salt and pepper to the cooked onions.

Lightly flour the pizza peel and stretch the pizza dough on the peel into about a 9 inch circle.  Spread the tomato sauce on the pizza, along with the cooked sausage and onions.  Top with the mozzarella cheese and bake the pizza for about 15-20 minutes, until the crust and cheese is golden brown.

My Favorite: Margherita Pizza

Ingredients

  • pizza dough
  • 1 tablespoon olive oil
  • 1-2 vine ripened tomatoes, thinly sliced
  • 1/4 teaspoon of salt
  • 2 cups of fresh mozzarella cheese, shredded or sliced
  • 1/4 cup fresh basil leaves, julienned
  • 1/2 teaspoon dried oregano

Directions

Place the pizza stone in the oven and preheat it to 450 degrees.

Lightly flour the pizza peel and stretch the pizza dough on the peel into about a 9 inch circle.  Drizzle the dough with the olive oil.  Top with the tomato slices, salt, cheese, basil, and oregano.    Bake the pizza for 15-20 minutes, until the crust and cheese is golden brown.


Super Bowl Snacks - Buffalo Sweet Potato Fries

I love buffalo everything.  The combination of sweet and spicy in these fries is so addicting!

Ingredients

  • 4 sweet potatoes, scrubbed clean
  • 3 tablespoons canola oil
  • 3/4 cup buffalo sauce
  • 1 tablespoon minced fresh chives or parsley
  • Ranch dressing, for dipping

Directions

Preheat oven to 400F.

Cut potatoes into uniform, 1/4-inch fries. In a large bowl, Spread fries onto baking sheet, drizzle with just enough oil to coat the fries and toss.  

Bake until tender and slightly cripsy, about 20 minutes, flipping once, about halfway though.

Take fries out and place in a large bowl and toss with buffalo sauce. Spread fries back onto the baking sheet.  

Bake another 5-10 minutes. Sprinkle with chives or parsley and serve immediately with Ranch dressing alongside for dipping.

Super Bowl Snacks - Zesty Ranch Pretzels

Since the Steelers are not in the Super Bowl, it's a little hard for me to get excited about the big game.  However, I can always get excited about an excuse to eat game day food!

For the rest of the week I would like to share some of my favorite game day treats.  Starting with this very simple fan favorite, zesty ranch pretzels.  They are easy to make and the perfect snack to take along with you to your Super Bowl party.

Ingredients:

  • One 1lb. bag of sourdough pretzels, broken into bite size pieces
  • 1 cup of canola oil
  • 1 envelope packet of Hidden Valley Ranch ranch seansoning
  • 1 1/2 teaspoons of dill weed
  • 1 1/2 teaspoons of garlic powder
  • 1/12 teaspoons of freshly ground black pepper
  • 1 1/2 teaspoons of fresh grated lemon zest

Directions

Preheat oven to 200 degrees.  Add all ingredients to a large bowl and toss to combine.  Pour onto an ungreased baking sheet and bake for 1 hour, tossing every 15 minutes.